But you can get results like this in about 7 seconds (2 secs a pass or so), with only 1 light, and no final gather or GI, and it doesn't flicker during animation:
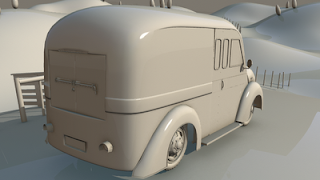
So how do we get to these shaders to be visible in Maya? With this handy dandy line of MEL!
Simply go to your script editor, type in:
optionVar -intValue “MIP_SHD_EXPOSE” 1;
(If you're on a mac, I recommend you type this out manually, there's some issues with copying and pasting quotation marks, where Maya won't recognize them as quotation marks) and run it. Then reopen Maya and voila!
Voila what? There's nothing there!
...well there is. If you open up the Hypershade, all our shiny newly available production shaders are prefixed with mip, so if we do a search from that in our Mental Ray tab, we can find the production shaders.
There's about sixteen of them, and if you're interested in more detail than I go into here, Mental Images has released a white paper outlining the purpose of each of these shaders and how to use them. Because I'm a lovely person, I had a bit of a rummage for it, and you can download it by right clicking here and clicking save as.
While pretty much everything in there is useful, I want to talk about the mip_grayball and mip_mirrorball shaders.
The mip_grayball shader is a concept very loosely related to spherical harmonics, a very complex way of calculating light emission in order to provide a type of ambient illumination. There's a very wordy explanation on it if you look at the Wikipeida article, but I will not be held responsible for any brain cramps or explosions due to an overload of math.
An important thing to note before we get into this is the mip_grayball shader works on the presumption that you have some sort of spherical light probe information, which means that the direction of the camera in your scene and the direction of your camera in the light probe photo should match. Rotating around a scene may get you strange (and possibly spooky?) results. For info on how to do light probe photography, check out HDRIshop's tutorial section.
But, for now here's how we can use the mip_grayball and mip_mirrorball shaders without having to subject ourselves to all these complex mathematical concepts.
We can use the mip_grayball shader to create an ambient light for our scene. This can be done either as a pass, or plugged into each of the geometry shaders. Considering the grayball shader needs to be plugged into everything that will have ambient light, it's probably easier to create a new render layer, and make a shader override which uses it.
But "Oh!"" you say, "What about pretty final gather and global illumination?" This method doesn't mean you have to toss your final gather and global illumination out the window. If you're lighting a cg scene, a good way of getting your sample data is to light your scene as you would using final gather and global illumination, and place an 18% gray matte sphere where you expect your point of focus to be. Center in your camera from the angle you plan to render from, and save out the image. Crop it, blur it a bit, and voila, you're ready to use mip_grayball for an ambient light.
For the example I'm using, I have geometry from our current production at Media Design School, and two probe samples from PixelCG:
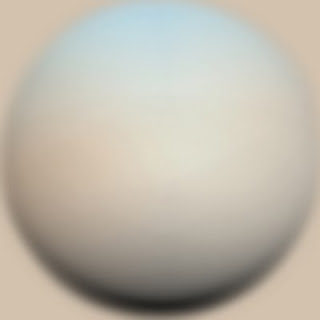
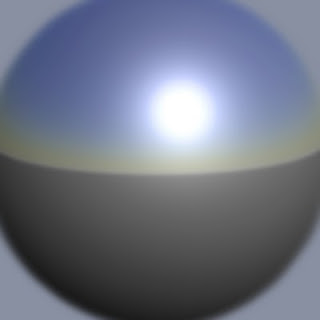
Here's what we've got in the way of the scene. This scene uses a single directional light with raytraced shadows, tinted warm, to be the sunlight. There's currently a basic grey matte mia_material_x_passes on everything:
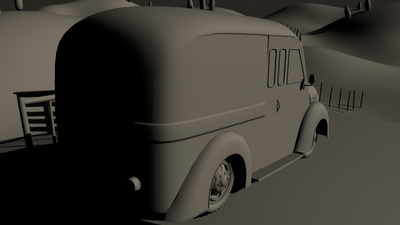
Now I create another render layer, taking all the geometry from my scene. I assign a layer override to a new mia_material_x, with no reflections, no refractions, and black in the colour slot, then create an mip_grayball shader. The shader itself its pretty simple, you will of course have your pretty final gather rendered ball for your scene, but I am using the above matte ball example. I create a new mental ray texture in the texture slot, and assign the gray ball image.
Then I plug the mip_grayball shader into the mia material's additional colour slot. When you render, it's lightning fast and you get something like this:
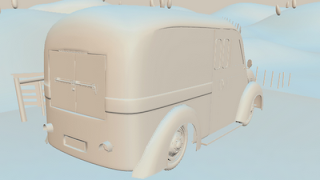
Not much to look at, but you can see you have all the bounce light coming from the correct direction, our blue tones from above, and earthy brown tones from below. After this, if we want, we can make a reflection pass with mip_mirrorball.
create a new render layer, with a fully reflective mia_material_x shader with no refractions and a black colour, and make it the shader override for the layer. Create an mip_mirrorball shader, and use a chrome ball image in the texture's image slot. Map the reflective mia shader we created, and plug the mirrrorball shader into the mental ray Environment shader slot within the shader group. When we render, we get something like this:
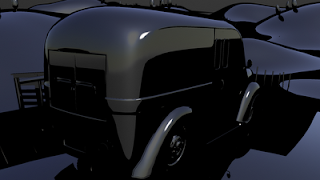
Excellent! Now, using our preferred method, we create an occlusion pass:
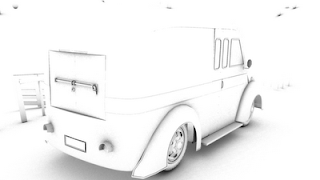
We end up with four passes (beauty, mip_grayball, mip_mirrorball and occlusion), and can now comp everything together.
I'm doing my compositing in Nuke, but this should be pretty easy to copy in other compositing packages. I use a merge node to add the grayball render onto the beauty. Note, you have to lower the mix quite a bit to get it looking nice, it's a case of tweaking it till it looks good. From there, I use a hue correct node to darken and saturate the creases in my geometry based on the occlusion shader (Prevents the dark blacks you get when using just the occlusion multiplied in). From there, add a little bit of the reflection in (mine's pretty even because it's an example, but only make reflection maps for things you're reflecting). Finally, a small grade to get everything looking a bit nicer. Here's the tree:
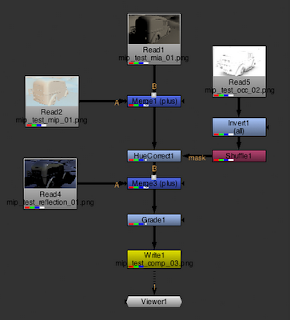
And the final image looks something like this:

This is a great way to get lighting for animation, as it shouldn't flicker or pop, and it's super fast!
Hope you guys enjoy it as much as I did :D
Hi Oana,
ReplyDeleteThanks for share this trick with the world... the final render looks awesome . I tried to follow your steps, but I couldn't get the same result as yours... mine looks way different :) especially the "mirrorball shader".
My Maya knowledge is very basic, so I'm not sure if I an doing something wrong. I'm using a simple scene: 2 planes to simulate floor and walls, and a cube.
Btw... your blog is awesome and your artwork as well.
Cheers,
John
Hi John,
ReplyDeleteif you send me an email (taunise@gmail.com) maybe I can help you troubleshoot your problem.